In today’s digital age, email has become an essential communication tool for individuals and businesses alike. Gmail and MS Outlook are two of the most popular email clients in use today. Gmail, with its intuitive interface and powerful features, has gained immense popularity, while MS Outlook is a long-standing favorite due to its robust feature set and flexibility. If you’re someone who prefers to use MS Outlook but also wants to access their Gmail account, you’re in luck. In this blog, we’ll take a look at how you can configure Gmail to work with MS Outlook.
Step 1: Enable IMAP Access in Gmail to manually configure Gmail in Outlook, you need to enable IMAP access in your Gmail account. Here’s how:
- Log in to your Gmail account.
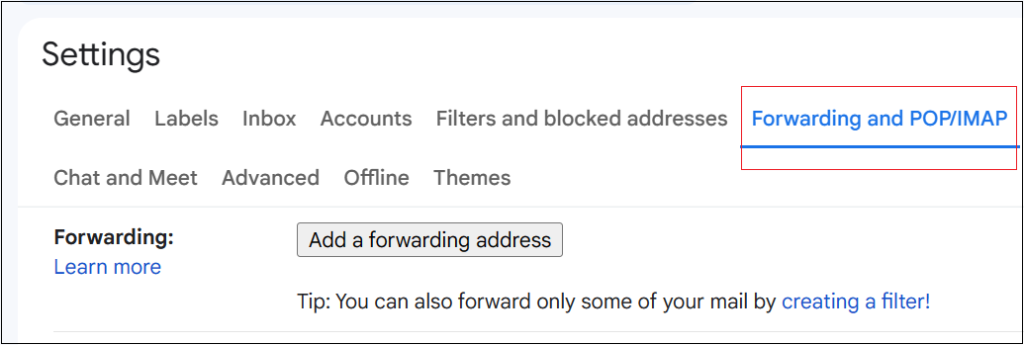
- Click on the settings icon in the top right corner of the page and select “Settings” from the dropdown menu.
- Click on the “Forwarding and POP/IMAP” tab.
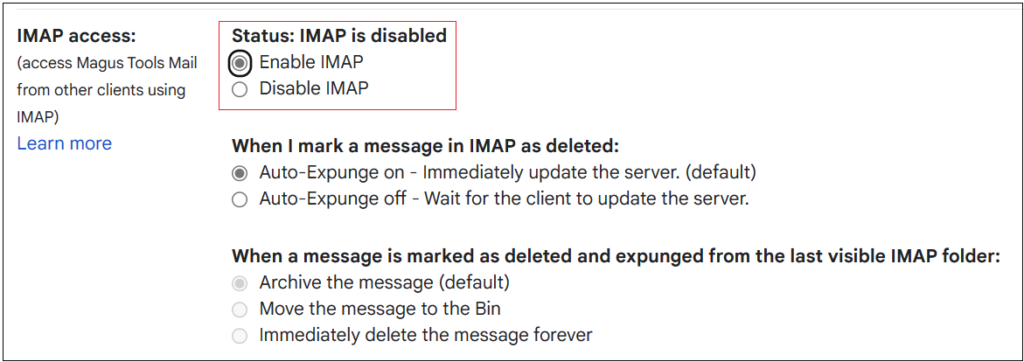
- Under the “IMAP Access” section, select “Enable IMAP” and click on “Save Changes” at the bottom of the page.
Step 2: Add a New Account in Outlook Now that you have enabled IMAP access in Gmail, you can add a new account in Outlook. Follow these steps:
- Open MS Outlook and click on the “File” tab.
- Select “Add Account” from the menu.
- Select “Manual setup or additional server types” and click on “Next”.
- Choose “POP or IMAP” and click on “Next”.
Step 3: Enter Your Account Information Now it’s time to enter your account information in the required fields. Here’s what you need to do:
- In the “Your Name” field, enter your name as you want it to appear in the “From” field of your emails.
- In the “Email Address” field, enter your Gmail address.
- In the “Account Type” field, select “IMAP”.
- In the “Incoming mail server” field, enter “imap.gmail.com”.
- In the “Outgoing mail server (SMTP)” field, enter “smtp.gmail.com”.
- In the “Username” field, enter your full Gmail address.
- In the “Password” field, enter your Gmail password.
Step 4: Configure Advanced Settings Next, you need to configure the advanced settings. Here’s how:
- Click on the “More Settings” button.
- Select the “Outgoing Server” tab.
- Check the box that says “My outgoing server (SMTP) requires authentication”.
- Select the “Advanced” tab.
- In the “Incoming server (IMAP)” field, enter “993”.
- Check the box that says “This server requires an encrypted connection (SSL)”.
- In the “Outgoing server (SMTP)” field, enter “587”.
- Select “TLS” from the drop-down menu present next to “Use the following type of encrypted connection”.
Step 5: Test the Account Settings Now you need to test the account settings to make sure that everything is working properly. Here’s how:
- Click on the “Test Account Settings” button.
- Outlook will send a test message to your Gmail account and then retrieve it.
- You will see a “Congratulations! All tests completed successfully” message when everything works properly.
However, there are quite a few instances where even after the configuration is done correctly, Gmail does not work with MS Outlook. To overcome this issue, you can opt for various troubleshooting methods to rectify them.
Conclusion:
Manually configuring Gmail in Outlook can seem like a daunting task, but it’s actually quite straightforward if you follow these steps. Once you have completed the process, you will be able to access your Gmail account in Outlook and take advantage of both clients’ features. Whether you’re a business professional or a casual user, this configuration will make your life easier and more productive.

Emily
I'm a content writer with a solid understanding of software and technical topics, which allows me to break down complex concepts into clear, engaging content. I enjoy creating articles, guides and documentation that connect with both tech-savvy readers and those new to the subject